Level: Intermediate
I have written quite a few articles that contain embedded references to DAX Queries and DAX Table functions in the past. Today I am writing an article that introduces the DAX query language from the beginning so you can learn how to use it and how it will help you to become a Power BI superstar.
What is a Query Language?
A query language is a programming language that allows you to send a request to a database and then receive data back in the form of a table. If you only have a few hundred rows of data then this is not overly useful. If on the other hand you have millions of rows of data then it becomes very useful.
The most important difference between DAX when used in Measures and Calculated Columns and DAX as a query language is that the query language always returns a table. The resulting table will consist of one or more columns, none or more rows, and data inside none or more of the cells in the table.
Why Do I Need a Query Language?
When you create a data model in Power BI or Power Pivot for Excel, you are essentially loading tabular data into a dedicated reporting database for the expressed purpose of analysis and/or reporting. Once it is loaded, you (the report author) then typically spend hours of effort building out the data model so it can be used to add value to your business/job. Finally once this is all done, the most common way to use your new data model is to build reports and pivot tables that present data to a user in a way that is easy to understand.
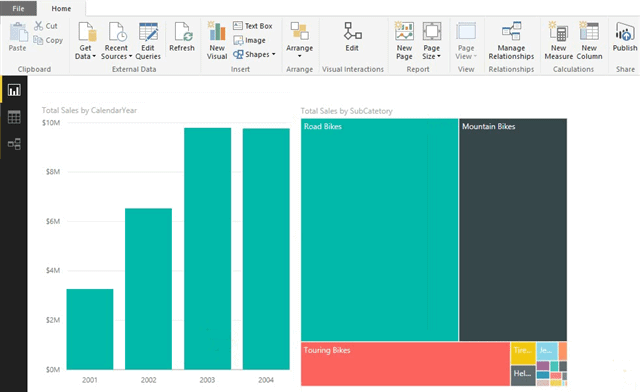
Below is an example of an interactive Power BI report that runs off a Power BI data model.
And here is a Pivot Table that runs off an Excel Power Pivot data model.

Both of these above visualisations are summarisations of the underlying data and in both cases you can’t actually see any of the the underlying data itself, just the summary. The visualisation tools above are great and have enormous utility however they are generally not the best tools if you want to see the underlying data itself or if you want to extract very large sets of data for whatever reason.
Once you have invested all this effort in building your data model, you are going to want to use it to the fullest extent. Power Pivot and Power BI can handle many millions of rows of data (unlike traditional Excel) and so the “old way” of simply looking at the underlying table is not really practical in this brave new world.
Show Me the Underlying Data!

If you take the pivot table I showed earlier, most Excel users would be aware that they can double click on any value cell (say 31.6% representing Mountain Bike sales to people aged between 30 and 40 years of age). When you double click on a traditional pivot table in this way, something magical happens – a copy of the underlying data is extracted from the source and it magically appears in a new sheet in Excel. Once you are done looking at the copy of the data, you can delete the new sheet and you are back where you started – life is good.
When you double click on on a traditional pivot table in this way, you are effectively sending a query to the underlying database and the query response is a table of data.
But Does it Work With Power Pivot?
In short, yes and no depending on what you are looking for. The experience is different if you have an Excel Power Pivot data model or if you are connected to an external SSAS data source. In my experience the results are inconsistent at best and at worst it may not give you what you expect. But the good news is that with DAX as a query language you can easily write any query you want and extract exactly the subset of data you need. You no longer have to rely on double clicking your pivot table to interrogate your data.
Time To Learn DAX as a Query Language
OK, enough of the chatter, time to get serious about DAX as a query language. You have invested time and effort in building your data model in Power BI or Power Pivot and now you rightly want to extract a subset of your data so you can take a look at it. Let’s get started.
First Select the Right Tool
There are 3 general approaches you can take to extract a table of data from your fabulous data model.
- Use a dedicated tool like DAX Studio or SQL Server Management Studio. I wrote an article describing how to install and use DAX Studio here.
- Write a “New Table” in Power BI Desktop. I wrote an article about how to use this feature here.
- Use an Excel “table hack” I learnt from Marco Russo to extract a table directly into Excel. I will cover this hack later in this article series.
I am going to use DAX Studio in this blog article but you can use Power BI “New Table” if you want to follow along and you don’t have (or want) DAX Studio. In fact if you want to learn this stuff then you really should follow along using either approach. In my experience you can’t learn new concepts simply by reading. Please note however that using Power BI and Excel as a query tool should be considered as a temporary extraction of the data. Once you have looked at the data you want, you would normally delete the table so you don’t end up storing redundant data (you can always extract it again if you need it).
Let’s Start With the Evaluate Statement
All DAX queries must start with the EVALUATE statement. There is an exception however. When you use the Power BI “New Table” button to write a query, you simply omit this EVALUATE statement. This is no doubt another example of “Syntax Sugar” where the developers shield the user from some of the more confusing syntax. If you are following along and testing my queries below in Power BI, then simply omit the EVALUATE statement when you write the queries. In addition if you ever want to move your DAX Studio query to a table in Power BI, then you can just remove the EVALUATE statement at that time.
Connecting DAX Studio to the Database
When I launch DAX Studio I am prompted to connect to my database. In this case I have an instance of Power BI Desktop with an Adventure Works data model running on my PC and DAX Studio gives me an option to connect to that. You can also connect to Excel Power Pivot data models and Tabular SSAS servers.

If you want a more comprehensive overview of the DAX Studio UI, then read my other post I mentioned earlier. Otherwise let’s get into it.
Return an Existing Table
The easiest DAX query you can write is to simply return a complete copy of an existing table.
EVALUATE
Customers
When I run this query in DAX Studio (shown as 1 below) and then press F5 to run, the entire table is returned (shown as 2). A total of 18,484 rows of data (shown as 3).

This in itself is not overly useful as chances are you have this table already in some source system.
List of Unique Values
In DAX there are many functions that return tables instead of scalar values. I covered this topic in depth last week so you can read up on that here if you like.
Let me now look at the ALL function.
EVALUATE
ALL(Products[Category])
When I execute this table function as a query, I can actually “see” the results of the query. In this case the query returns a single column table consisting of 4 rows – all the unique product categories.

Next let’s look at VALUES.
EVALUATE
VALUES(Products[Category])
In this instance, the VALUES table function returns exactly the same result.

Now let’s look at DISTINCT.
Evaluate
DISTINCT(Products[Category])
And same again here.

All three of these table functions return the same table in this instance. In reality they all do different things in different filtering scenarios. This is one of the great things about DAX Queries is that you can “inspect” what is happening to these table functions in different scenarios. More on that later.
A Two Column Table
The ALL function can take 1 or more columns as an input (or a table). In the example below I have used ALL to materialise a table of all of the combinations of Product Category and Product Sub Category. There are 37 unique combinations in all.

A Filtered Table
Most people that know DAX will know of the FILTER function. The FILTER function returns a filtered copy of a table. eg see the example below:
EVALUATE
FILTER(Products, [Total Sales] > 200000)
This is a much more interesting query because it returns a table containing all the products that have sold more than $200,000 of sales over all time. There are 49 such products.


Altering Filter Context
When you write a DAX measure or Calculated Column, there is only 1 way you can change the filter context and that is using the CALCULATE function. CALCULATE returns a scalar value after applying filters. CALCULATETABLE is the sibling of CALCULATE. As you can probably guess, CALCULATETABLE returns a table after applying filters.
This next query returns exactly the same result as the last query.
EVALUATE
CALCULATETABLE(Products, FILTER(Products, [Total Sales] > 200000))

The main difference with using CALCULATETABLE compared to just using FILTER is that CALCULATETABLE can return a different table to the FILTER function itself.
EVALUATE
CALCULATETABLE(Sales, FILTER ( Products, [Total Sales] > 200000))
The above query uses the same FILTER function from before, but instead of returning a table containing the products that sold more than $200,000, it returns all of the actual sales transactions that contributed to those products qualifying (see results below).


Combining Table Functions
Now that you see how some of the standard table functions work in a query, let’s look at combining them together into a single query.
EVALUATE
CALCULATETABLE(
  VALUES(Products[SubCategory]),
  FILTER(Products, [Total Sales] > 50000)
)
This query first applies a filter on all products that have sold more than $50,000 (line 4 below), and then returns a list of unique product subcategories that contain these products.

One interesting thing in the query results above is that “helmets” are in the list (the only non-bike subcategory). To see what the exact products where that sold, it is simply a matter of writing another query as follows.
EVALUATE
CALCULATETABLE(
   VALUES(Products[ProductName]),
   FILTER(Products, [Total Sales] > 50000),
   Products[SubCategory]="Helmets"
)

Note how I was able to reuse the the original query structure to return the list of product names with just a minor change to the query.
More to Come Next Week
This is a big topic – too big for a single blog article. This week I introduced the topic of DAX queries, I showed how you can write queries to return tables and how you can combine table functions together to interrogate data. Next week I will introduce some new special query functions that extend the capabilities even further.
I am glad to be a visitor of this everlasting web site! , thanks for this rare information! .
Respect to author, some excellent entropy.
Hi there! Do you know if they make any plugins to help with SEO? I’m trying to get my blog to rank for some targeted keywords but I’m not seeing very good success. If you know of any please share. Kudos!
I love it when people come together and share opinions, great blog, keep it up.
Fantastic website. Plenty of useful info here. I’m sending it to a few friends ans also sharing in delicious. And of course, thank you for your effort!
This site can be a stroll-by means of for all of the data you needed about this and didn’t know who to ask. Glimpse right here, and also you’ll positively uncover it.
Hello.This article was really motivating, particularly since I was searching for thoughts on this issue last Friday.
There is perceptibly a lot to realize about this. I consider you made certain nice points in features also.
In this grand pattern of things you secure an A+ just for hard work. Where exactly you actually misplaced me was first in your facts. As they say, details make or break the argument.. And that could not be much more true right here. Having said that, let me reveal to you what exactly did work. The writing is rather persuasive and this is probably why I am taking the effort to comment. I do not make it a regular habit of doing that. Next, whilst I can easily see a jumps in reason you make, I am not really certain of how you appear to connect the points which in turn make the actual final result. For now I will, no doubt subscribe to your point but trust in the near future you link your facts much better.
Glad to be one of many visitants on this awesome internet site : D.
fantástico este conteúdo. Gostei bastante. Aproveitem e vejam este conteúdo. informações, novidades e muito mais. Não deixem de acessar para aprender mais. Obrigado a todos e até a próxima. 🙂
I loved as much as you’ll receive carried out right here. The sketch is attractive, your authored material stylish. nonetheless, you command get got an edginess over that you wish be delivering the following. unwell unquestionably come further formerly again as exactly the same nearly a lot often inside case you shield this increase.
Pretty nice post. I just stumbled upon your blog and wished to say that I have really enjoyed browsing your blog posts. In any case I’ll be subscribing to your rss feed and I hope you write again very soon!
Valuable info. Lucky me I found your website by accident, and I’m shocked why this accident didn’t happened earlier! I bookmarked it.
I like reading through and I believe this website got some genuinely utilitarian stuff on it! .
I always was interested in this subject and still am, appreciate it for posting.
Your point of view caught my eye and was very interesting. Thanks. I have a question for you.
Good afternoon Matt Allington
I am a new member. My name is Tuan. I am a Financial Accountant, from Vietnam, Asia. I work as an Accountant. I have developed great interest in Power BI, to improve efficiency and integrity of Financial Reporting. I have been doing most of my data analytics through Excel. I hope to learn a lot from your website . I have many problems in my reports and would like to get help from experts .
If you can help me, can I send a problem which I can’t solve to you ?
Thank you and best regards
thanks for sharing the great post.
I would come back to check new posts on power bi
Hi matt
Thank you for sharing. Tables product and sales must be joined or I can write queries even if they are not?
In the examples in this post the tables must be joined. There are other scenarios where you can write queries when the tables are not joined, but these are not covered here.
Hi Matt,
I use Power Query a lot but not Power Pivot. How do I use DAX if I only use Power Query but not Power Pivot?
Thanks,
Ferdinand
The short answer is “you don’t”. DAX is the language of Power Pivot. If you don’t use Power Pivot you can’t use DAX
Adventure-Works-basic.zip is an empty folder without any files being zipped?
Sorry about that. It was a bit more basic than I intended :-). Try again now.
Thanks. It includes pbix file now.